Zabbix Agent installation and Passive monitoring
At this point we are familiar with the Zabbix dataflow, how to create hosts and,
add interfaces and items to a host. As a system administrator or anyone else working
with Linux, Unix or Windows systems usually we jump right into installing the Zabbix
agent and monitoring with it. Using our previous steps however, we have laid the
groundwork for building a proper monitoring solution. We have prepared our systems
before monitoring, which is the most important part to avoid Monitoring fatigue
later on.
Monitoring fatigue and Alert fatigue
Monitoring fatigue and Alert fatigue are two terms heard in monitoring and observability:
-
Alert fatigue happens in Zabbix when you configure too many (incorrect) triggers. When you flood your dashboards or even external media like Teams or Signal with too many alerts your users will not respond to them any longer.
-
Monitoring fatigue happens in Zabbix when you misconfigure things like dashboards, items, host groups, tags and other internal systems that keep things structured. The result is that you or your co-workers do not want to use your own system any longer as it does not deliver the right information easily enough.
Now, we are ready to start monitoring an actual system.
Agent basics
We have prepared an example setup in our Book LAB environment.
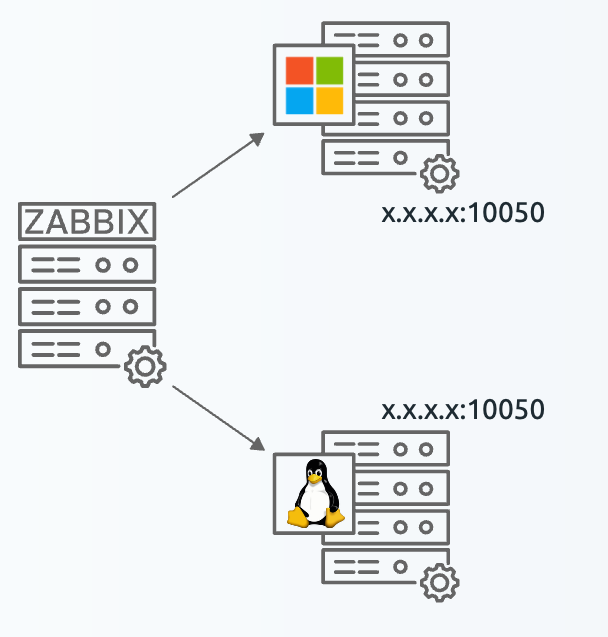
4.14 Zabbix Agent passive hosts
What we can see here is a setup you might see in any datacenter or office server cabinet. We have a Zabbix server monitoring one Windows server and one Linux server directly (or through a proxy). We call Zabbix a network monitoring solution as it communicates over the network. In Zabbix we have two methods of communication.
- Passive Otherwise known as
polling. We communicate from the Zabbix server (or proxy) towards the monitoring target. The monitoring target is listening on a port waiting for Zabbix to request data. - Active Otherwise known as
trapping. We communicate from the monitoring target towards the Zabbix server (or proxy). The Zabbix server is listening on a port waiting for the monitoring target to send data.
As you can imagine there is quite a big difference between these two methods of communication. Often times it depends on the protocol which method is preferred. For example SNMP traps are always an active type of check.
The Zabbix agent however can communicate in either Active or Passive mode.
It can even do those simultaneously. Simultaneous communication can be useful when
you want to use Passive mode for all communication, but still want to execute
some items that are Active only. Active items can do everything Passive
items can do however.
Active vs. Passive Communication in Zabbix Agent
The Zabbix agent supports two communication modes: Active and Passive. Each mode has distinct behaviours, use cases, and implications for performance and configuration.
Passive Mode
In Passive mode, the Zabbix server initiates the connection to the agent to request data. The server polls the agent for each metric, waits for the response, and closes the connection after receiving the data. The server sets the timestamp for the collected value, which may reduce accuracy.
- Concurrency: The agent can handle multiple simultaneous checks using multiple threads (default: 3).
- Flexibility: The agent is not bound to the hostname in its configuration file, allowing the same configuration to be reused across multiple hosts or having the same agent being queried from multiple hosts in the Zabbix frontend.
Pros: - Simple to configure and manage. - Ideal for environments where the server can directly access the agent. - Supports concurrent checks, reducing delays caused by slow scripts or commands.
Cons: - Increases server load and network traffic as the number of agents and items grows. - Requires additional firewall/NAT configuration for incoming connections on all monitored hosts, which may pose security risks. - Data collection fails if the server cannot reach the agent. - Some items (e.g., log items) are not supported in passive mode. - Timestamps are less accurate, as they reflect when the server receives the data, not when the agent collects it.
Active Mode
In Active mode, the agent proactively requests item lists from the server and periodically sends collected metrics without waiting for server requests. This mode is useful in environments with strict firewall rules or when the server cannot directly access the agent.
- Buffering: Zabbix Agent 2 can buffer active check results during server outages, ensuring uninterrupted data collection.
- Timestamps: The agent sets the timestamp for collected values, improving accuracy but requiring synchronized time between the agent and server.
Pros: - Reduces server load by eliminating constant polling. - Works well in restricted network environments, as the agent initiates the connection. - Improves scalability in large environments by distributing part of the load. - Supports buffering of item values during server outages (Agent 2 only). - Provides more accurate timestamps, as they are set by the agent at the time of collection.
Cons: - Requires the hostname in the agent configuration to match the hostname in the Zabbix frontend, reducing flexibility. - Uses a single thread for data collection, so slow checks can delay subsequent ones. - Accurate time synchronization between the agent and server is critical for data integrity.
Choosing Between Active and Passive Modes
The choice depends on your environment and requirements: - Use Passive mode for simplicity and direct server-agent communication. - Use Active mode to reduce server load or navigate network restrictions. - A hybrid approach is often optimal: for example, use Active mode for most checks and Passive mode for specific items (e.g., long-running checks or those requiring different hostnames).
Finally, let's do a bit of a comparison between the two modes.
| Feature | Active Agent | Passive Agent |
|---|---|---|
| Timestamp | Set by agent | Set by server/proxy |
| Log Items | Supported | Not supported |
| Port | Connects to server port 10051 | Listens on 10050 |
| Hostname | Must match frontend configuration | Flexible |
| Remote Commands | Supported | Supported |
| Concurrency | Single thread | Multiple threads |
| Buffering on Outage | Yes (Agent 2) | No |
The flexibility of Zabbix allows you to tailor your monitoring solution to best fit your needs.
In the current section we will start with the Passive mode, and in the next
section we will look at the Active mode.
Zabbix agent vs Zabbix agent 2
Before we can configure either though, we will have to install our Zabbix agent
first. When installing on Linux and Windows we have a choice between two different
agents, Zabbix agent and Zabbix agent 2. Both of these Zabbix agents are still
in active development and receive both major (LTS) and minor updates. The difference
between them is in Programming language and features.
| Zabbix agent | Zabbix agent 2 | |
|---|---|---|
| Features | No focus to include new features | Supports everything agent 1 does + more |
| Programming language | C | GoLang |
| Extensions | C Loadable Modules | GoLang plugins |
| Platforms | All | Linux and Windows |
| Concurrency | In sequence | Concurrently |
| Storage on outage | No | Sqlite |
| Item timeouts | Agent wide | Per plugin |
Note
As you can see, Zabbix agent 2 is the more feature-rich agent and is the
recommended agent to use when available. However, Zabbix agent is equally
supported and can be used when Zabbix agent 2 is not available for your platform
or if you have specific use cases that require Zabbix agent. For example, if you
want to use a C Loadable Module that has not yet been ported to Zabbix agent 2,
you will have to use Zabbix agent.
Also, as C is a lower level programming language, Zabbix agent can be more
performant in certain use cases such as monitoring embedded devices or devices
with very limited resources.
Agent installation on Linux
Installation on Linux can be done in one of three ways. Through direct install
files like .rpm and .deb, by building from sources and through packages pulled
from the repository. Installation through the packages is preferred as this means
Zabbix agent will be updated when updating with commands like dnf update and
apt upgrade. Keep in mind, Zabbix agent is a piece of software just like any
other and as such new versions will contain security and bug fixes. Whatever
installation method you choose, keep your Zabbix agent up-to-date.
We will be using the packages on RedHat-, SUSE-based or Ubuntu to install
Zabbix agent 2. To use the packages we will need to prepare our system
as outlined in chapter: Getting started.
Only adding the Zabbix repository is mandatory here, however following the
Requirements outlined in that chapter
is also recommended to make sure you have all the necessary tools to work with
Zabbix.
After adding the repository, we should be able to install Zabbix agent 2.
install Zabbix agent 2 package
Redhat
SUSE
Ubuntu
After installation make sure to start and enable the Zabbix agent.
Your agent is now installed under the zabbix user and ready to be configured.
Agent installation on Windows
On Windows, we have two options to install our Zabbix agent. Through downloading
the .exe file and placing the configuration files in the right location or the
easy option. Downloading the .msi and going through the installation wizard.
Whichever method you prefer, you'll first have to navigate to the Zabbix download
page. We will be using the .msi in our example.
https://www.zabbix.com/download_agents?os=Windows
Here you will be presented with the choice to download either Zabbix agent or
Zabbix agent 2. Choose whichever one you would like to install, but by now we
recommend Zabbix agent 2 as it is stable and includes more features.
Once downloaded, we can open the new zabbix_agent2-x.x.x-windows-amd64-openssl.msi
file and it will take us to the wizard window.
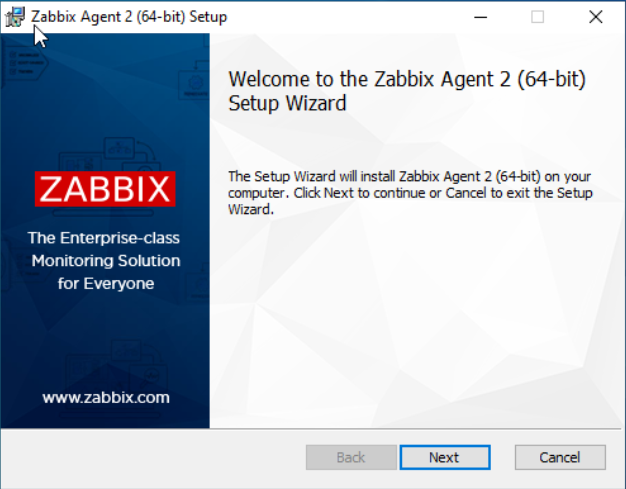
4.15 Zabbix Agent Windows install step 1
Step 1 is a simple welcome screen, nothing to do here except click on Next.
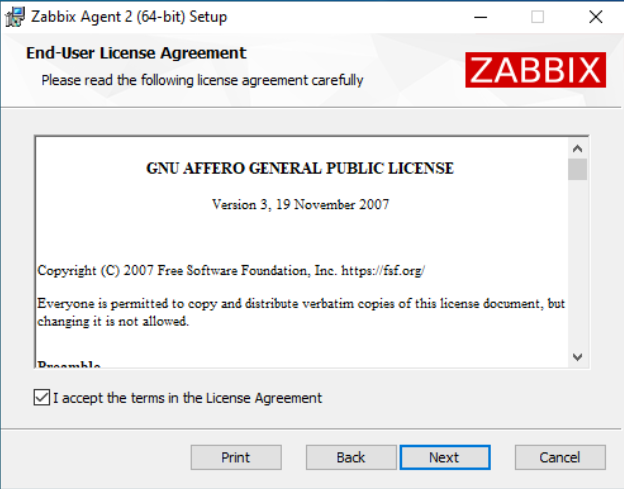
4.15 Zabbix Agent Windows install step 2
For step 2, make sure to read the License Agreement (or don't, we do not give
legal advice). Then click Next.
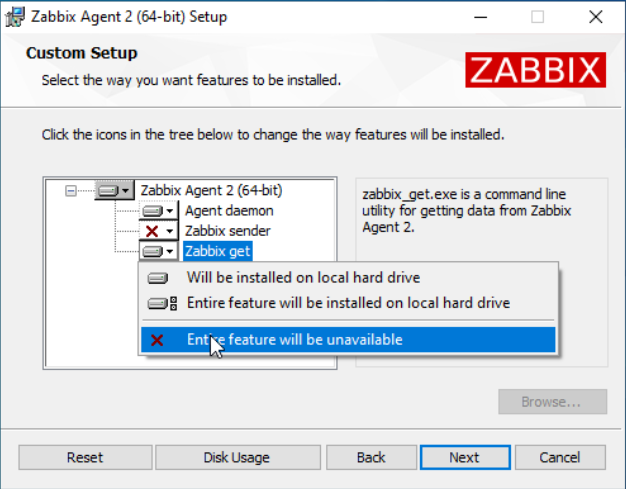
4.15 Zabbix Agent Windows install step 3
For step 3 we have some more actions to execute. By default the Zabbix agent on
Windows .msi installer includes Zabbix sender and Zabbix get. These are
separate utilities that we do not need on every Windows server. I will not install
them now, but we can always use the .msi to install them later. The Zabbix agent
will function fine without them.
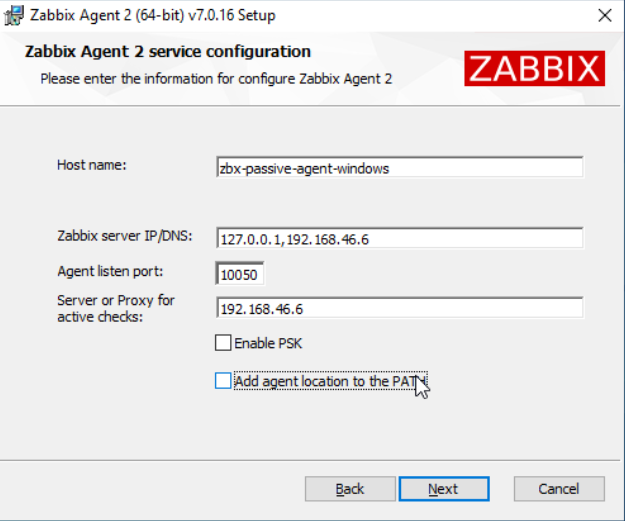
4.15 Zabbix Agent Windows install step 4
Step 4 is our most important step. Here we will already configure our Zabbix agent
configuration file, straight from the .msi installer. Let's make sure to set
the Hostname, Zabbix server IP/DNS (192.168.46.6 in our case) and let's
also set the Server or proxy for active checks parameter. As you can see we
could also immediately configure encryption with the Enable PSK option, but
we will do this later.
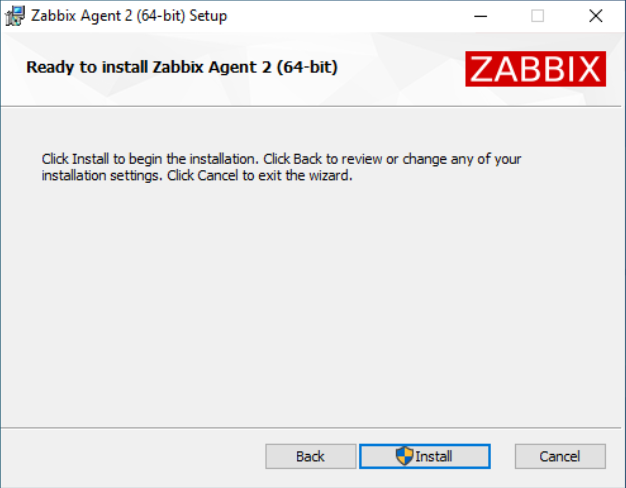
4.15 Zabbix Agent Windows install step 5
Now there is nothing left to do except press Install and our Zabbix agent will
be both installed and configured.
Agent installation on Unix
For Unix based systems, simply download the files on the Zabbix download page for
either AIX, FreeBSD, OpenBSD or Solaris.
https://www.zabbix.com/download_agents
Agent installation on MacOS
For MacOS systems, simply download the files on the Zabbix download page and run
through the .pkg installer.
https://www.zabbix.com/download_agents?os=macOS
Agent side configuration
Configuring the Zabbix agent is similar for all installations. Whether you are on
Linux, Unix, Windows or MacOS you will always find the zabbix_agent2.conf file.
The parameters in this configuration file are mostly the same, regardless of the
operating system.
SUSE Linux
On SUSE Linux (SLES or OpenSUSE) 16 or higher, the Zabbix agent configuration
file is located at /usr/etc/zabbix/zabbix_agent2.conf and should not be edited
as it will be overwritten when the package is updated.
Alternatively, you need to create an additional configuration file in the
/etc/zabbix/zabbix_agent2.conf.d/ directory and include your custom
configuration there. This way you can keep the original configuration file
intact and only add your custom settings in the new file.
For Passive Zabbix agent connections we have only one important parameter to
configure out of the box. The Server= parameter. This parameter functions as an
allowlist, where we can add IP addresses, IP ranges and DNS entries to a list.
All of the entries in this Server= allowlist will be allowed to make a connection
to the Passive Zabbix agent and collect data from it.
Edit your configuration file to include your Zabbix server (or proxy) IP address, IP range or DNS entry.
As you can see in the example, I've left 127.0.0.1. Although not required, this
can be useful in certain situations. Through the use of a comma , we have indicated
that both 127.0.0.1 and 192.168.46.30 are allowed to connect. If you are running
Zabbix server in HA mode or if you are using Proxy Groups, make sure to include all
entries for the Zabbix components that need to connect.
After making changes to the Zabbix agent configuration file, make sure to restart
the Zabbix Agent 2 service. On Windows systems, use the service manager, on Linux
systems use sytemctl to restart.
If you do not restart, the changes will not take effect.
Also make sure to check if you have a local firewall running on your system.
If you do, to be able to use the Passive agent, make sure to configure the
firewall to allow incoming connections to the service zabbix-agent or explicitly
open up the port 10050/tcp to allow the Zabbix server or proxy to connect
to the agent.
Server side configuration
On the Zabbix server side we can now create a new host to monitor. Let's call
it zbx-agent-passive-rocky or zbx-agent-passive-windows and let's add the interface.
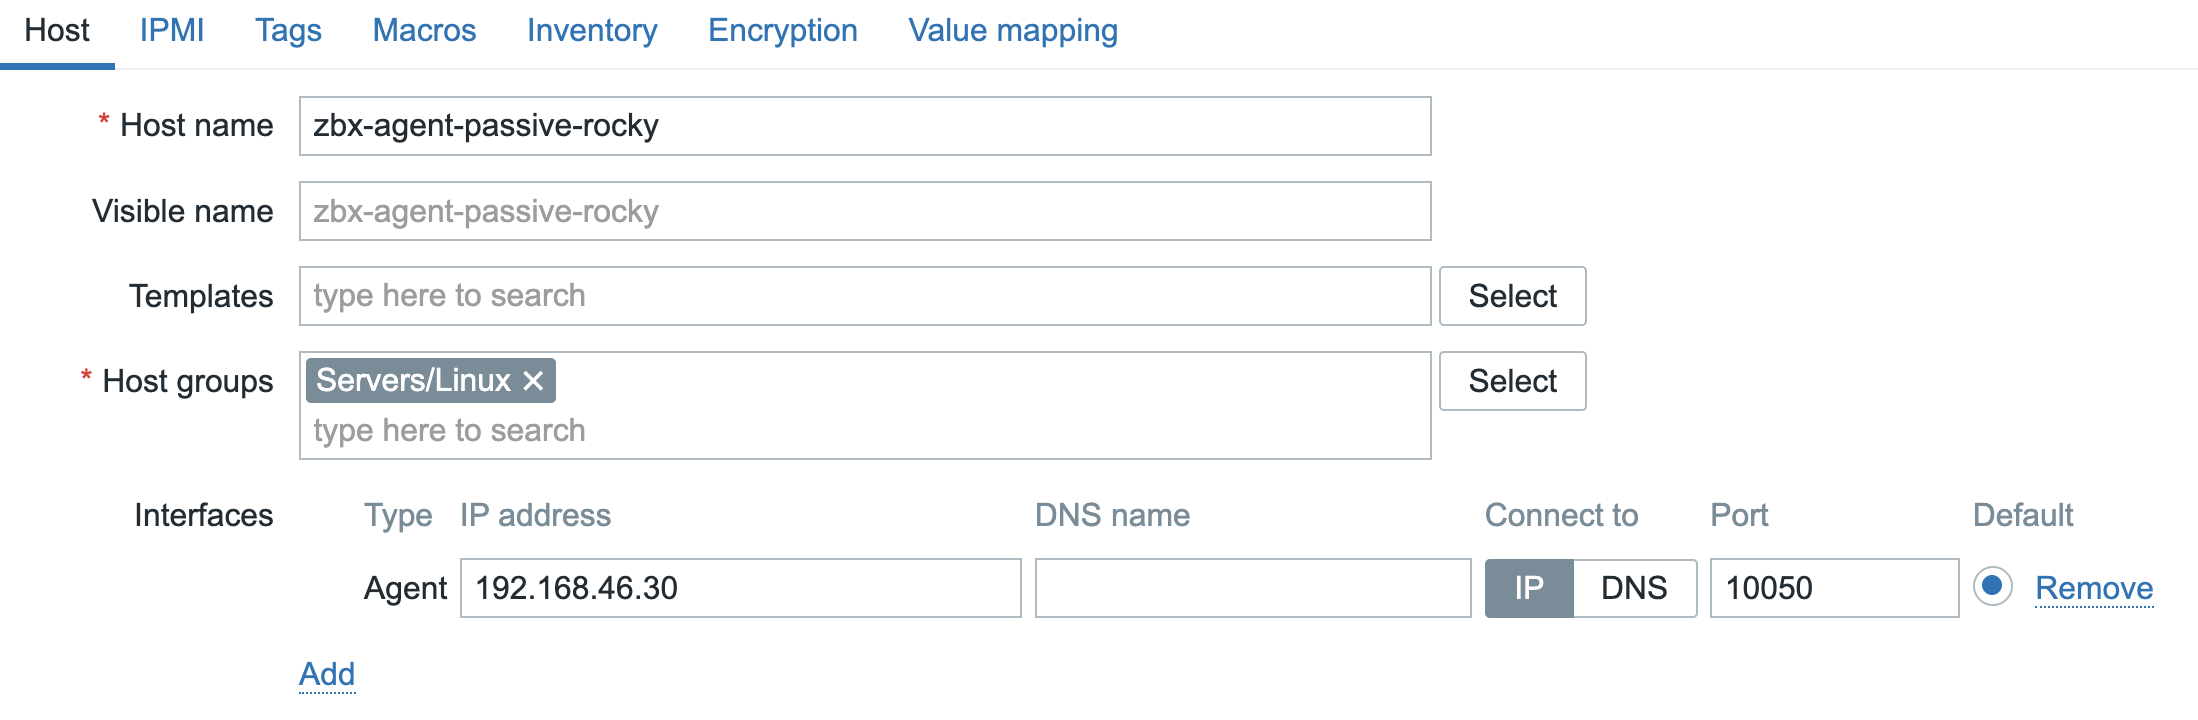
4.20 Zabbix Agent passive Linux host
For Windows it looks similar.

4.21 Zabbix Agent passive Windows host
With the host added, correctly with an interface, we can now start monitoring.
To do so, let's create one Zabbix agent item type as an example. For your new host
zbx-agent-passive-rocky or zbx-agent-passive-windows in the Zabbix frontend,
click on Items and then Create item in the top right corner.
Let's create an item System hostname, making sure that if we have more system
items alphabetical sorting will group them together. For Passive Zabbix agent
the type Zabbix agent is used and we have to specific an Interface. We will
use the item key system.hostname.
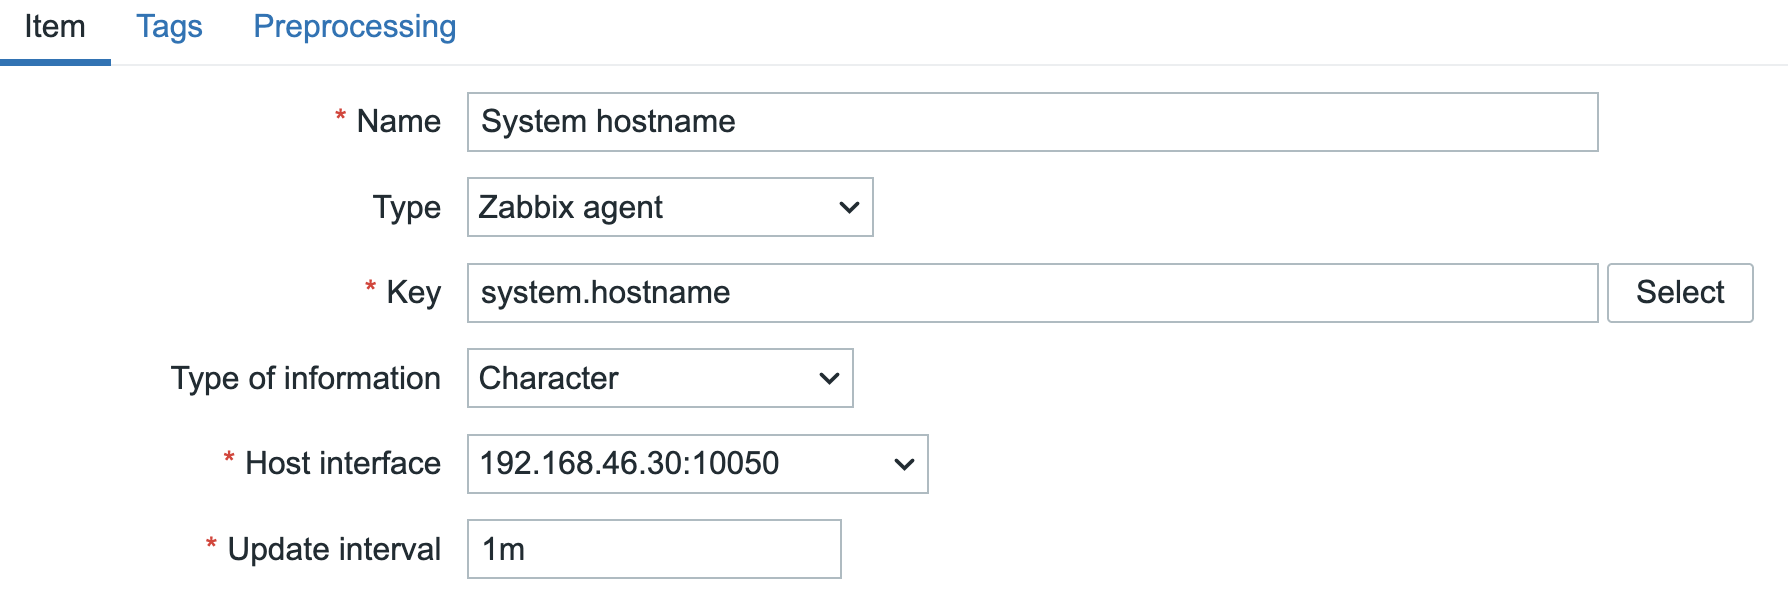
4.22 Zabbix Agent passive host item
Do not forget to add the standard component tag to the item to follow the best
practice.

4.23 Zabbix Agent passive host item tag
Conclusion
We learned about the two communication methods of the Zabbix agent, Active and
Passive. We discussed the differences between these two methods and their pros
and cons so that you can make an informed decision on which method to use when
in your environment.
Installing the Zabbix agent can be done with either Zabbix agent or
Zabbix agent 2. By now Zabbix agent 2 is recommended when available, but
Zabbix agent is also fully supported. Make sure to install the Zabbix
agent through the most easily secured method and keep it updated.
Once installed, for Passive communication we used the Server= parameter
to keep our agent secured. We do not want everyone to be able to connect and query
this agent, even when there might still be a firewall or two in between.
Finally, we created a host and an item to start monitoring with our Passive
Zabbix agent.
Questions
- What are the differences between
Zabbix agentandZabbix agent 2? - What are the differences between
PassiveandActiveZabbix agent communication? - Why may you want to use
Passivemode for a long running custom script item?
Useful URLs
- https://www.zabbix.com/documentation/current/en/manual/concepts/agent
- https://www.zabbix.com/documentation/current/en/manual/concepts/agent2
- https://www.zabbix.com/documentation/current/en/manual/installation/install_from_packages
- https://www.zabbix.com/documentation/current/en/manual/appendix/agent_comparison
- https://blog.zabbix.com/zabbix-agent-active-vs-passive/
- https://www.zabbix.com/documentation/current/en/manual/appendix/items/activepassive